Cute crafts, nerdy crafts, frilly crafts, girly crafts, guy-friendly crafts, ALL THE CRAFTS!
Showing posts with label felt. Show all posts

Tuesday, October 7, 2014

Mass Effect Felt Wall Plaque DIY (Flashback)

~*~*~*~*~*~*~*~*~*~*~*~*~
No, your memory is not failing you, nor is it that funny taste that may have been in your drink.  Although, if that actually happened, you may want to look into it.  You may have seen this post before.  In an attempt to make everything easier to navigate for everyone, I am working on transferring all of the old beauty and craft posts from the recipe blog to their appropriate homes on the newer wings.  Please bear with all the boring re-caps!
<3
-WW
~*~*~*~*~*~*~*~*~*~*~*~*~
This is, obviously, a continuance of the mad-craft-a-thon I endeavored in while the Wookie was is still glued to his new game.  In the spirit of his new game and how much he has been enjoying it, I decided to make a few of these:


Cute, eh?  Also SUPER-DUPER fast and easy.  If you make more than one, I'd suggest saving your first cut-out negative as a template, it makes the second one go faster.  I made two, one for the Wookie, and one for our awesome zombie-drawing friend he's been spending hours playing the online co-op with.

You may have noticed at this point, that I only do very simple patterns.  This is due to the fact that a) I can't draw so I have to keep things kindergarten-level easy, and b) I don't have a printer either, so that limits me quite a bit.

Anywho, I looked up logos from Mass Effect 3 and saw this one and was delighted to find something easy enough that my drawing-impaired ass could actually pull off.  As an added bonus, this just happened to be the Wookie's favorite logo in the game, so YAY, go me.  Or rather, go video game designers who make logos easy enough for me to cut out.  Whatever.

Moving right along...


First, pick your background color and clamp it into an embroidery hoop.  This is just one of the small plastic ones with the rubbery-stretchy-top-part-thingy.  God, I'm so descriptive I just floor myself sometimes.


This one didn't have a hangy-thing at the top (look out world, there I go again), so I used a small cup hook and just screwed it in, then bent the hook a bit more with some pliers (read: the Leatherman I keep in my purse because using the actual pliers would have required me to walk a whole extra 20 feet and excavate them from the rubble that is our storage room) until it was more hook-y than before so it wouldn't fall off whatever we nail it up with so easily.


Then, I drew the pattern out on to the appropriate colors of felt using a yellow off-brand Sharpie because I'm awesome enough to rock off-brands and because I didn't want black to bleed through and somehow using white chalk just didn't seem like a great idea.  This simple pattern, for me, required a straight-edge, yes.  No, I can't even draw a straight-fucking-line.

I'll give you a moment to laugh at me.

...

...

We good?

K.

Glue the pieces on with hot glue and you're done.

No, really that's it.


Voila!

<3
The Wookie Wifey

Sunday, November 10, 2013

Bunny Plushie DIY

~*~*~*~*~*~*~*~*~*~*~*~*~
No, your memory is not failing you, nor is it that funny taste that may have been in your drink.  Although, if that actually happened, you may want to look into it.  You may have seen this post before.  In an attempt to make everything easier to navigate for everyone, I am working on transferring all of the old beauty and craft posts from the recipe blog to their appropriate homes on the newer wings.  I'll be only one a day so as not to clog up your feeds, so please bear with all the boring re-caps!
<3
-WW
~*~*~*~*~*~*~*~*~*~*~*~*~

This post is a tutorial for...SURPRISE!  Another felt plushie.  A bunny plushie!

You're in shock, aren't you?

Yes, I'm on a plushie kick.


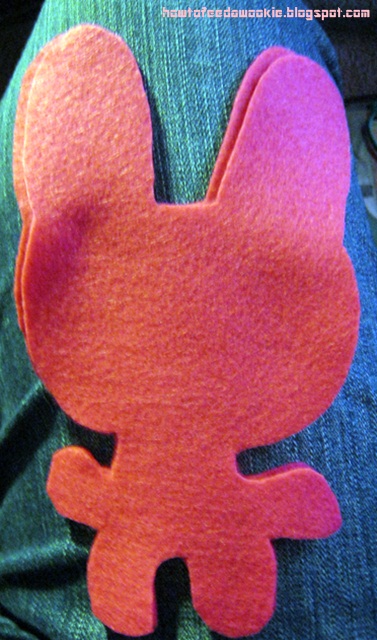
First, figure out what basic shape you want your bunny to be, then draw it onto the felt and cut it out of your desired color and don't forget to use two layers so you have a front and a back.  I wanted my bunny to have an abnormally large head.


Using one of your body-pieces, lay it on your sheet foam and cut around it so you have a roughly bunny-like sheet foam shape, then sandwich them all together.


Play around with face parts and figure out how you want your bunny to look.  This look really creeped me out, so I went with this one instead:


Once you get the look you want, either stitch or glue on all the pieces.  I glued most of them, but stitched the tiny white pieces and the sequins for his dreamy little eye glimmers on with thread because hot glue and felt tend to be a hard combination to control at times, and I absolutely loathe a project with hot glue bubbles and strings sticking out all over the place, so if its something tiny where I'm afraid I won't be spot-on in my application, I use another method.

Sandwich it all together, stitch it up, and now you have yourself a bunny plushie.


A cute little happy one without the creepy "I'll-come-alive-and-kill-you-in-your-sleep" teeth.

Unless its a gift for someone you secretly hate and you want them to be peeking out at the evil thing from under their blankie at night and trembling in terror - then use the creepy face for him.  This was for my niece and I love her and don't want to creep her out, so I made him all cute and friendly.  :)

<3
The Wookie Wifey

Wednesday, September 4, 2013

Hearthstone Plushie DIY

~*~*~*~*~*~*~*~*~*~*~*~*~
No, your memory is not failing you, nor is it that funny taste that may have been in your drink.  Although, if that actually happened, you may want to look into it.  You may have seen this post before.  In an attempt to make everything easier to navigate for everyone, I am working on transferring all of the old beauty and craft posts from the recipe blog to their appropriate homes on the newer wings.  I'll be only one a day so as not to clog up your feeds, so please bear with all the boring re-caps!
<3
-WW
~*~*~*~*~*~*~*~*~*~*~*~*~

This is one of my favorite projects still, even as simple as it is.  :)  It is just one of those things that gives me a happy every time I see it!

Isn't it obvious I just HAD to do this?  I mean, come on.  Its cute.  And home is where the hearthstone is, after all.  Which is usually either Undercity or Orgrimmar.


This was easy, but if you're confused on a few of the plushie steps, I've made a few already so you can check out this one if you need more clarification since its tutorial is pretty in-depth.  :)  Above, the hearthstone I made is pictured with Lurky, whom the Wookie got me from the Blizz store because he loves me and he's awesome.  (Not sponsored, duh, I'm just a WoW nerd.)


Since I didn't have any grey felt, I used white.  As usual of my plushies so far, I only have that sheet foam you see up there, so the stitching is on the outside because that stuff is nearly impossible for the inside-out-stitch-then-flip-and-stuff method.  Admittedly, though, the stitched-together-DIY look is rather starting to grow on me.

Back to business, cut out your two hearthstone shapes - I drew it on the felt in my awesome off-brand yellow sharpie (its hard to tell because is so cheap the print is fuzzy, but I think its technically a "Shoupie" or some shit and I have no idea why I find that so entertaining.), then cut them out.  Same with the swirl.  Three cheers for super easy patterns!

Once you have the hearthstone shapes, lay one on top of the foam sheet, then trim the foam around it to get your stuffing.  If it is the same size as your felt or even a teeny bit bigger, that's okay, you can just squish it in as you sew and it will be fluffier, just make sure it's not WAY too big or else it will try to fold and curl up and then you'll have a lumpy hearthstone.


Stack 'em and stitch 'em.  I used white embroidery floss, then just glued the swirl onto the front with hot glue because I wanted the swirl to be flat instead of all stitch-y,  but its whatever you prefer.


DONE!  Set it with your favorite innkeeper and there ya go!  I'm going to Azeroth now, I don't want to live on this planet anymore.

<3
The (totally nerdy) Wookie Wifey

Tuesday, September 3, 2013

Embroidered Felt Wall Art with Buttons...Cute...Thing.

~*~*~*~*~*~*~*~*~*~*~*~*~
No, your memory is not failing you, nor is it that funny taste that may have been in your drink.  Although, if that actually happened, you may want to look into it.  You may have seen this post before.  In an attempt to make everything easier to navigate for everyone, I am working on transferring all of the old beauty and craft posts from the recipe blog to their appropriate homes on the newer wings.  I'll be only one a day so as not to clog up your feeds, so please bear with all the boring re-caps!
<3
-WW
~*~*~*~*~*~*~*~*~*~*~*~*~

This is another one that got inexplicably popular...One of the most re-pinned, which is funny, because I was so unhappy with it I only posted it as a "well, here's...something, anyway"...sort of a "they can't all be winners" post.

Many of you may know Mass Effect 3 just came out.  On the night of its Wal-Mart birth, we went to get the Wookie a copy.  Now, I'm a gamer, but I wasn't at all stoked about Mass Effect 3.  There's many 360 games that I love to watch him play, but they've yet to come out with one that I want to play badly enough to deal with that massive, ungainly controller.  I'm a Play Station girl, what can I say, and since we don't own a PS3, this has pretty much limited me to PC gaming or playing on one of our gazillion other consoles we have lying around here.  Poor me, I know.

Anywho, since I anticipated he'd be neck-deep in Mass Effect 3 for at least the next month, I decided to stubbornly drag him around the Wally-World craft section for half an hour (total rant:  WHAT is up with the Wal-Mart craft section, it COMPLETELY AND UTTERLY SUCKS, which makes my life hell since any actual craft stores are to hell and gone across town and we rarely get out that way) until I found something to keep me occupied for a while while he was doing recliner-yoga, blasting things into oblivion, and making odd conversation with space aliens.  I ended up getting a big pack of felt and a econo-pack of embroidery floss.

This is the first project I made when we got home, and something I just played around with until I liked how it looked.


You'll need:
Buttons (I had a ton of vintage ones I was trying to find some uses for, which is where this project originated)
Embroidery floss - two colors  minimum
Thread
Felt
Embroidery hoop (I used a plastic one)
Sequins or other deco
Needle (duh)
Pins (optional, but they do make life easier)


First, pick the felt color you want for your background and put it in the hoop.  For those first-timers who aren't aware of how this works, you just put the little hoop on what you want to be the back-side of your felt and the big hoop on the front side, then push them together.  If you have a plastic hoop like the one I'm using, it should make it nice and taught all on its own.  If you use a wooden one, you may have to tug it taught on your own before you tighten down the little screw.  Once the felt is in place, you're ready to rock.


Place the buttons in whatever configuration you wish.  I just played around with them until I was happy with how it looked, then pinned them all in place by jamming a pin through a hole of each button.  Then, pick the color of embroidery floss you want to use to secure the buttons and thread your needle.


Sew on all the buttons.  I went through some of them twice, depending on how much I wanted the orange floss to show in the flowers.


Next, take the color you've chosen to do the details and stitch them in...Green if you're doing a flower pattern like me...Or brown if your flowers are dead, I guess.  I just eyeballed-it, didn't draw a pattern or anything.  I'm not THAT artsy and I can't draw to save my life and I'm not that good at embroidery, either, (still new at it and learning) but I figured there was something seriously amiss with me if I couldn't stitch a damned flower stem without a pattern.


Here's the completed stems.  Yes, I  know my leaves look more like thorns, don't make fun of me!!


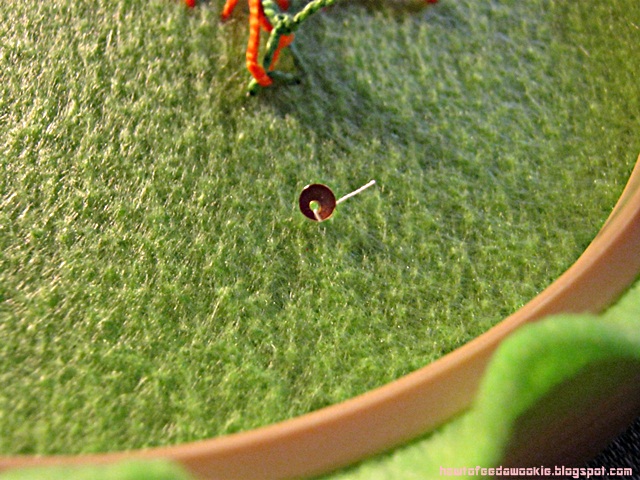
Next, I wanted to add a few gold and silver sequins for a bit of sparkle and to take up a bit of the dead space.  These, I sewed on with regular ol' white thread.  Now, I didn't want the knot at the end of the thread to go through the felt, so I just tied one of the little sequins to the end instead so it would catch in the back and my project would be all safe.


I randomly stitched on the sequins until I was satisfied with them.  Sometimes, you get ornery sequins and you have to make sure they know who the boss is.


Then, I trimmed off the excess felt.


Hang it up, and DONE.  YAAAY!  (And there was much rejoicing.)

<3
The Wookie Wifey